
Introduction
If there's one feature Firebase is missing, it’s a good and efficient way for searching through data. Their documentation suggests using a third-party solution:
"Cloud Firestore doesn't support native indexing or search for text fields in documents. […] To enable full-text search of your Cloud Firestore data, use a dedicated third-party search service."
Firestore-meilisearch, Meilisearch’s official Firebase extension, synchronizes documents between a Cloud Firestore collection and a Meilisearch index, monitoring each time you create, update, or remove documents from that index. This ensures the data in Meilisearch mirrors your content in Cloud Firestore, effectively enabling you to create a fully-featured search experience.
In this tutorial, we'll show you how to install the firestore-meilisearch extension on your Firebase instance and add full-text search to your Cloud Firestore.
Tools
- Firebase: Firebase is a platform developed by Google to help developers create mobile and web applications. It is a fully managed back-end service that provides an infrastructure for web applications that handles everything from user authentication and server scaling to crash analytics and reliable testing environments.
- Meilisearch: Meilisearch is a fast, open-source search engine that's a joy to use and deploy. Meilisearch allows you to create a relevant search experience out of the box in very few steps and with no configuration needed.
Requirements
To run this project, you will need:
- A Google account with a billing profile set up
- An open terminal or command prompt
- Node.js >= 14 && <= 17
- npm >= v7
Steps
Here's a summary of what we're going to do to create a nice search interface with Firebase and Meilisearch:
- Deploy Meilisearch
- Create a Firebase project
- Install Meilisearch’s Firebase extension
- Set up a search interface
Deploy Meilisearch
For this tutorial, you will need a Meilisearch instance running on a cloud service. There are many ways to deploy a Meilisearch instance. The easiest way to spawn a Meilisearch instance is using Meilisearch Cloud, there's a free 14-day trial, no credit card required.
Create Firebase project
Note: you can skip this step if you already have a Firebase Project with a Firestore Database containing your documents.
Once we have our Meilisearch instance up and running, we can create a Firebase project, configure it, and add a Firestore database.
Create a project
Follow the Firebase documentation to start your own project.
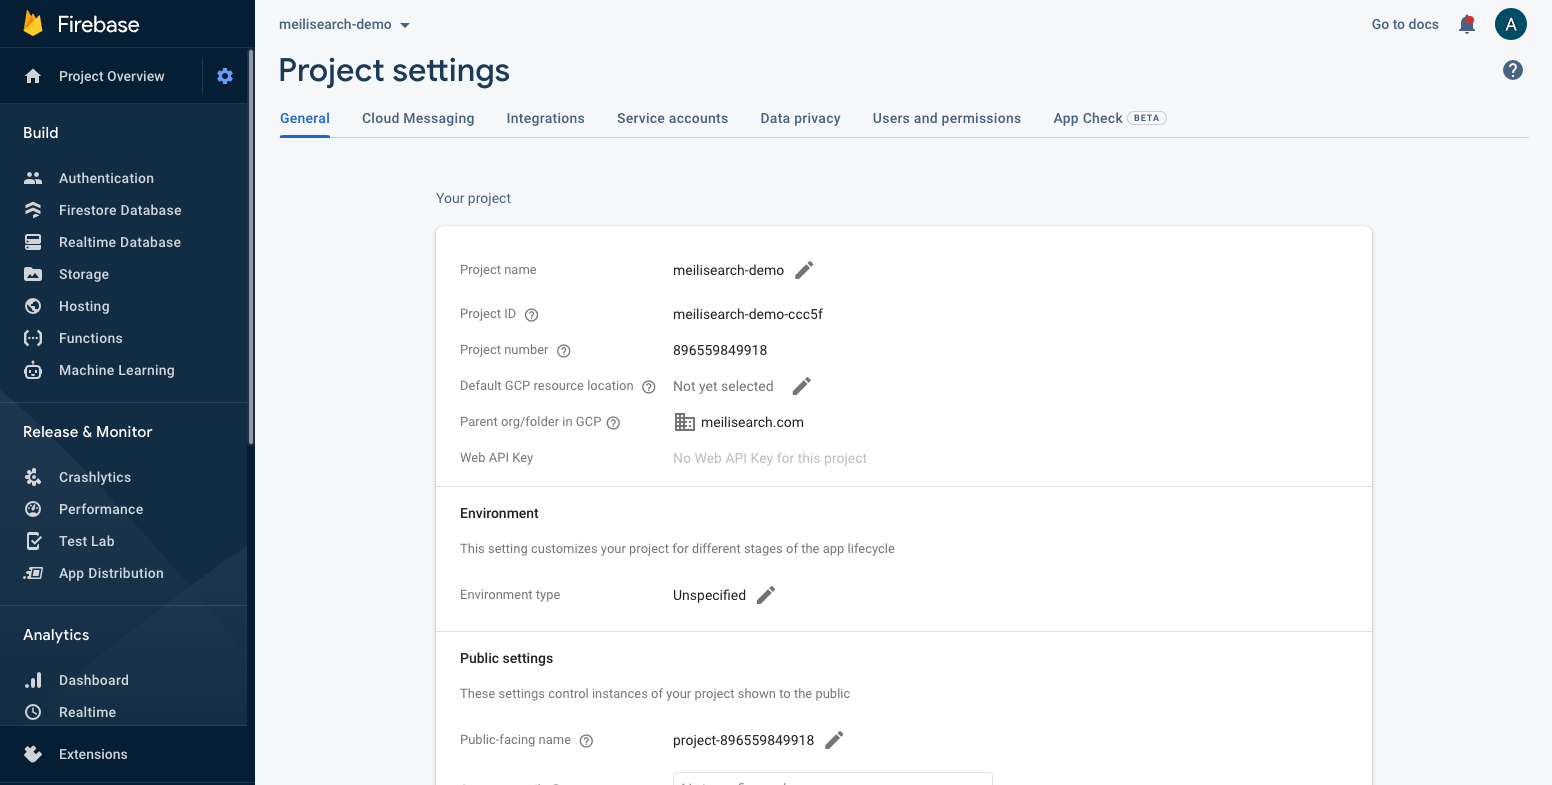
You should now have a project on your Firebase account that looks a bit like this:
Once we have created a Firebase account and our project, we will need to add a Firestore Database to our project. Consult Firebase’s documentation for more instructions.
Install Meilisearch extension
We now are ready to install the Meilisearch extension on our project.
⚠️ Billing
To install an extension, your Firebase project must be on a special billing plan that will charge you at least 1 cent a month.
Install and authorize firestore-meilisearch
To install the firestore-meilisearch extension on your Firebase project just follow this link that will redirect you to your Firebase console.
Select the project in which you want to install the extension. You will then have access to the installation panel. The panel consists of three main steps, with a final extension configuration section at the end:
- Early Access Partner extension: find
firestore-meilisearchunder Extensions Publisher Early Access Program, select it, and click on “Next” - Review billing and usage: Firebase will inform you about the charges incurred by using extensions, which we recommend you read carefully. If Firebase offers the option, click on “Update project to continue;” otherwise, click on “Next”
- Review APIs enabled and resources created: Firebase will also give you more information about Cloud Functions, a set of Firebase functionality we use in this extension. These instructions explain how Cloud Functions are triggered and their key capabilities
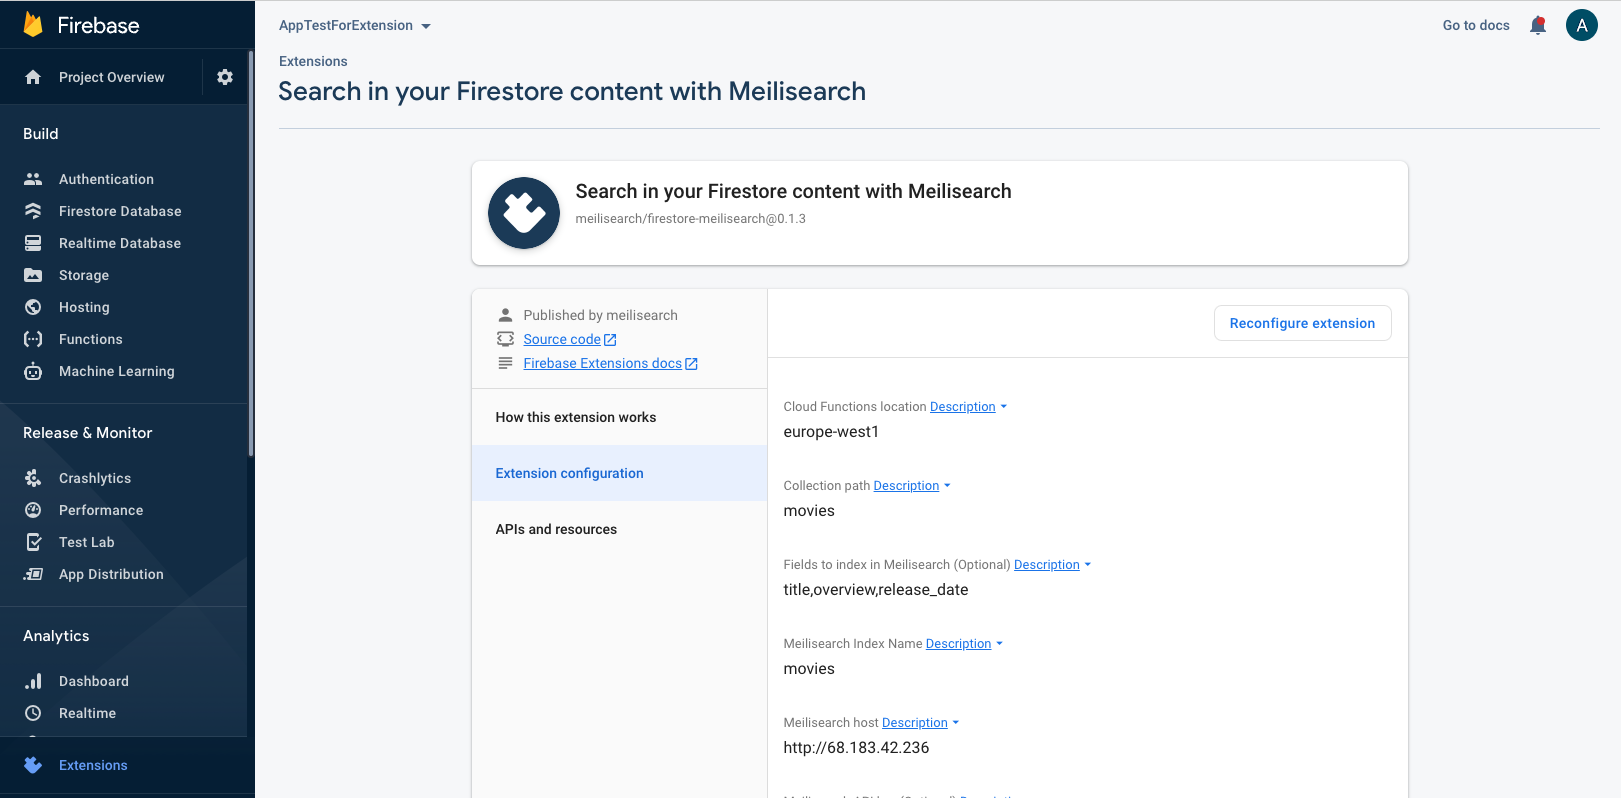
Configure firestore-meilisearch
The fourth and final step for activating firestore-meilisearch is configuring it.
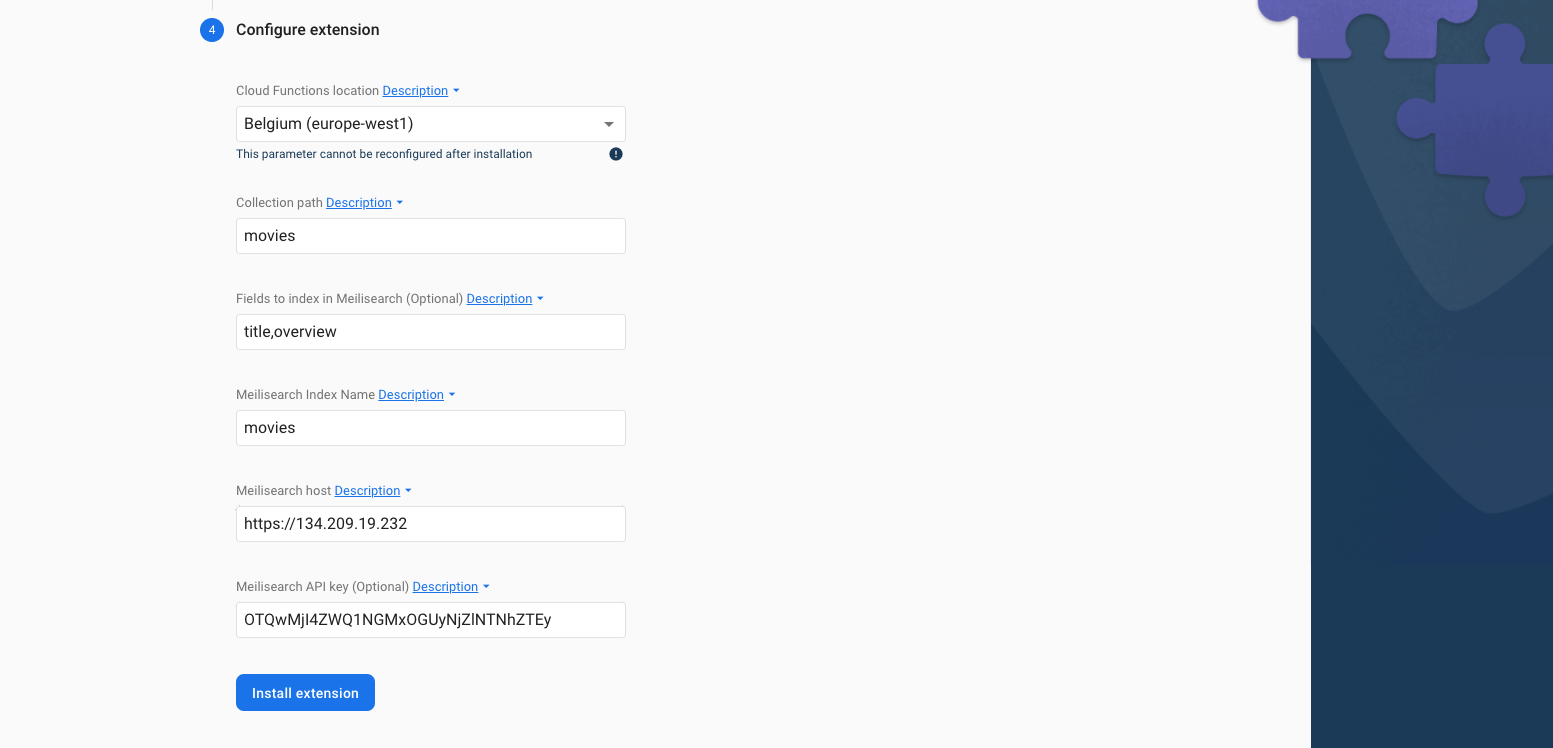
- Cloud Functions location: select the region where the backend code will be called whenever a document is added, updated, or deleted from Firestore. We recommend selecting regions close to your users and your Meilisearch instance
- Collection path: the name of the Firestore collection you want to mirror in a Meilisearch index
- Fields to index in Meilisearch (Optional): optional setting gives you the possibility to only index some of the fields in the documents contained in your Firestore database
- Meilisearch Index Name: the name of the Meilisearch index containing your Firestore data. Meilisearch will automatically created this index if it doesn’t exist
- Meilisearch host: the URL of your Meilisearch instance
- Meilisearch API key (Optional): a Meilisearch API key with permission to perform actions on indexes. For more info on API keys, consult our security guide.
You can also install this extension via the command line. To do so, make sure you've got the Firebase Command-Line tools installed, then run the following command:
firebase ext:install meilisearch/firestore-meilisearch --project=(your project ID)
Check if everything is working!
Suppose we are creating an application that allows users to search through a database of movies. Our first step is to create a collection named movies in Firestore:
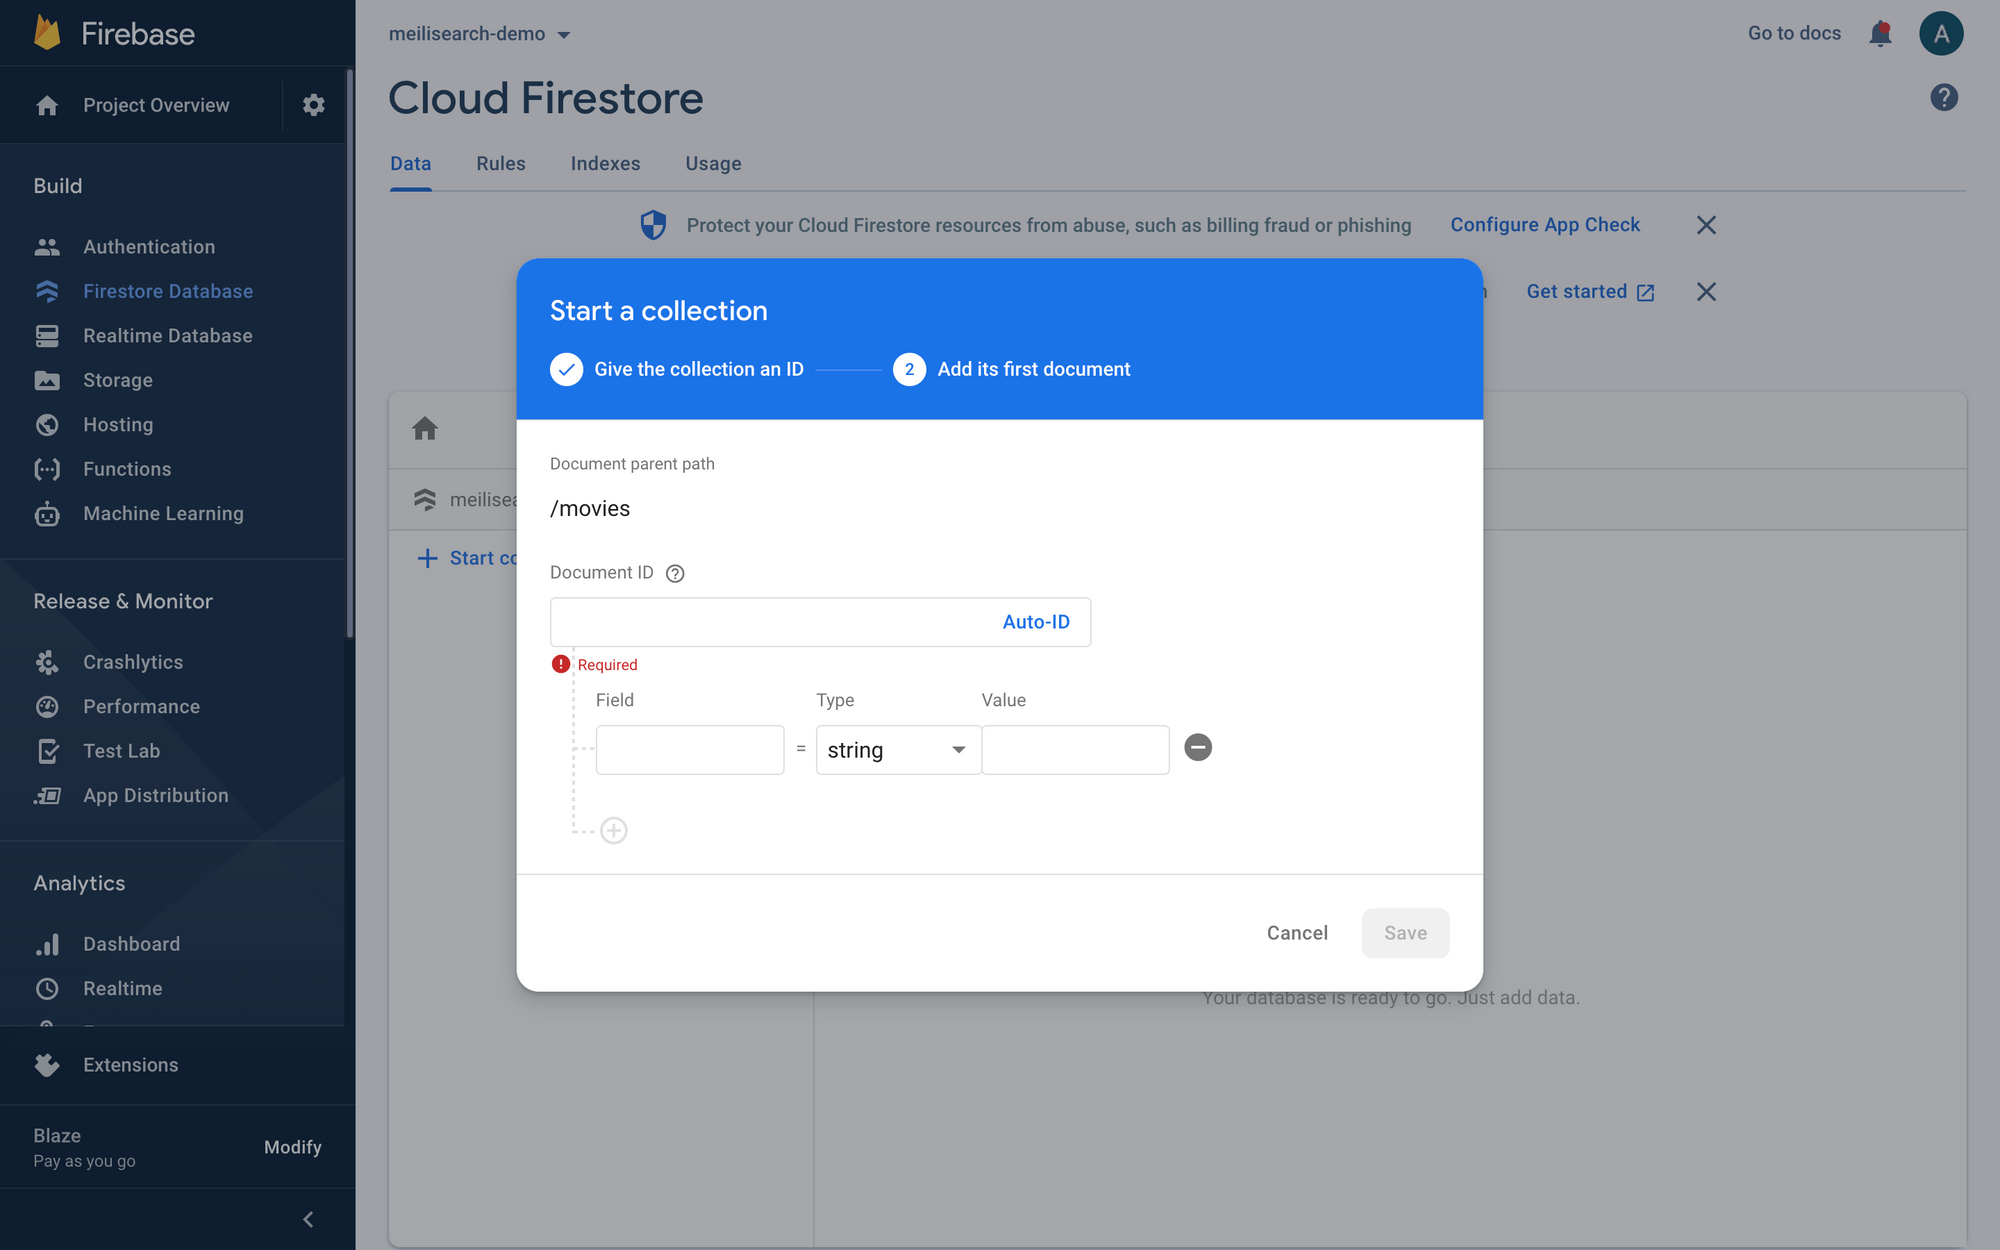
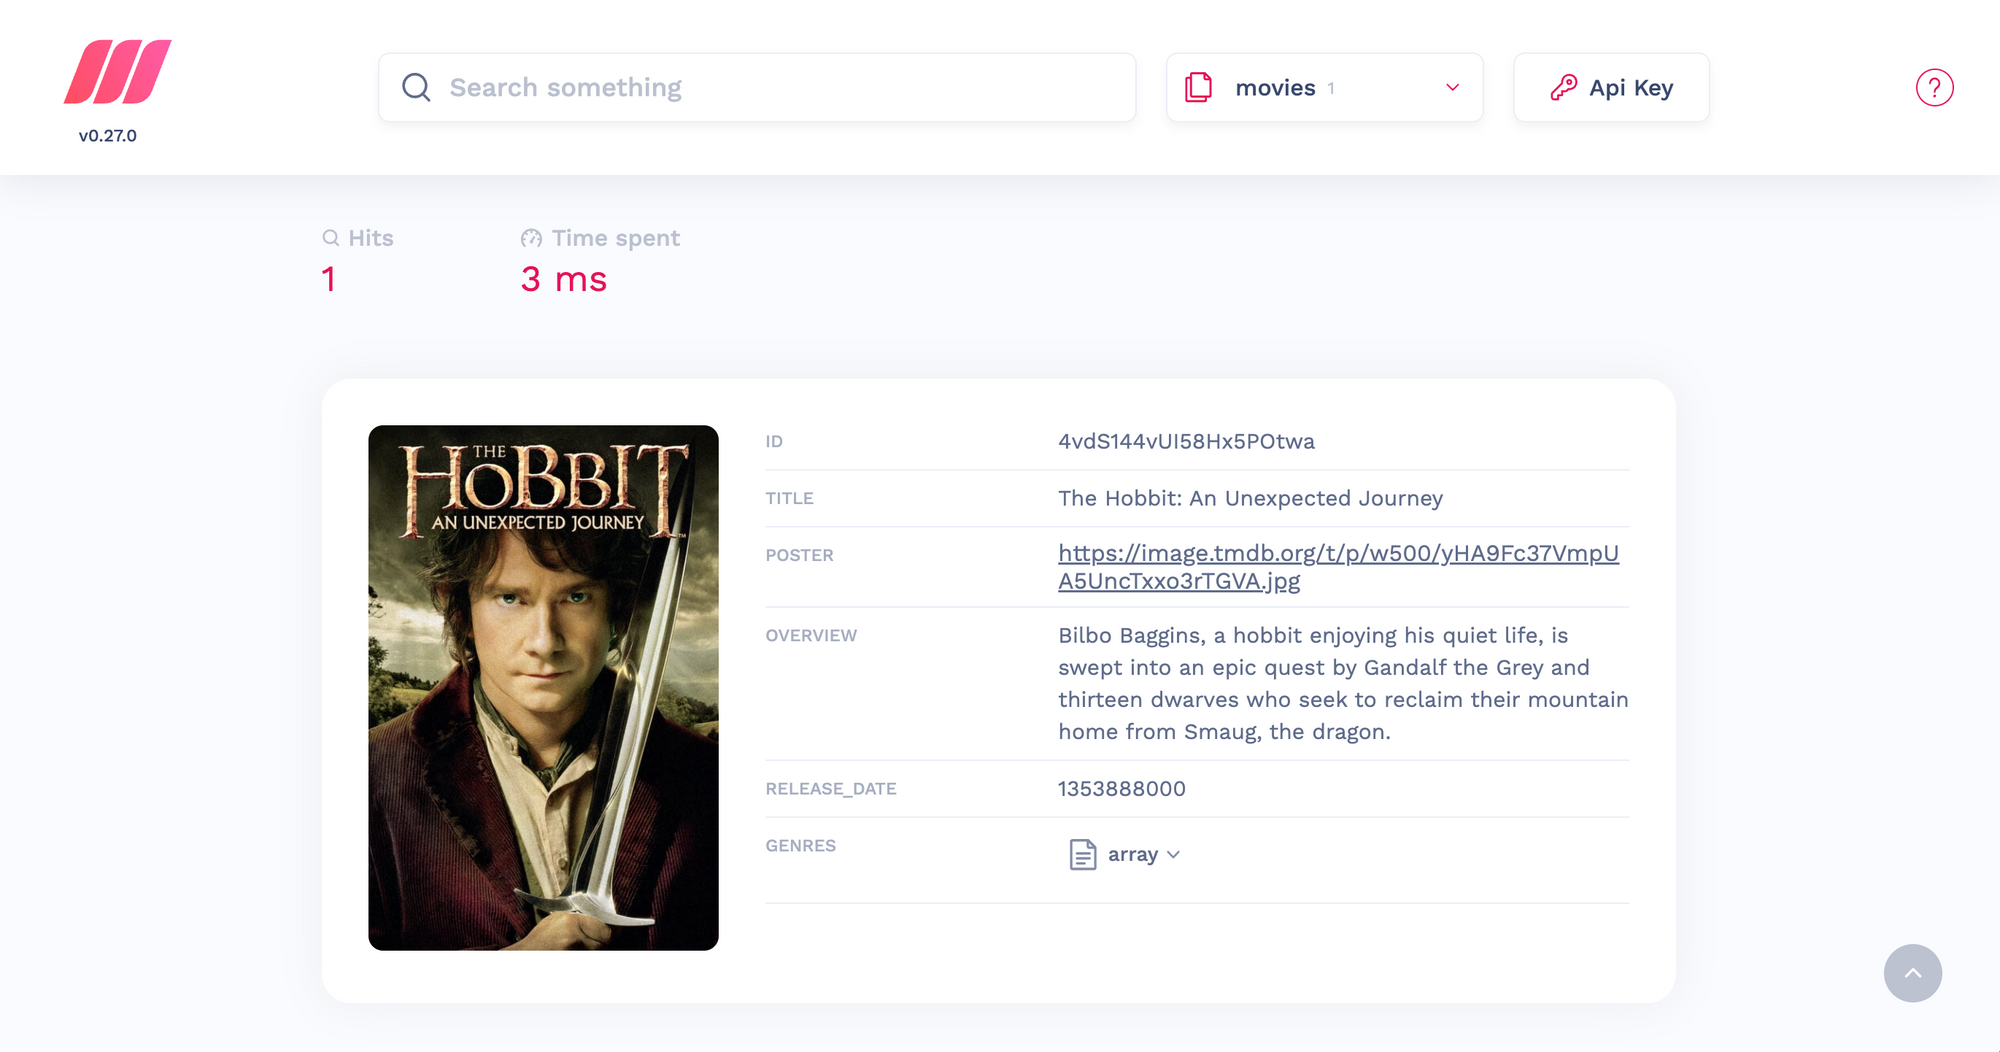
We can use Firestore Database’s access panel to manually add a movie document:
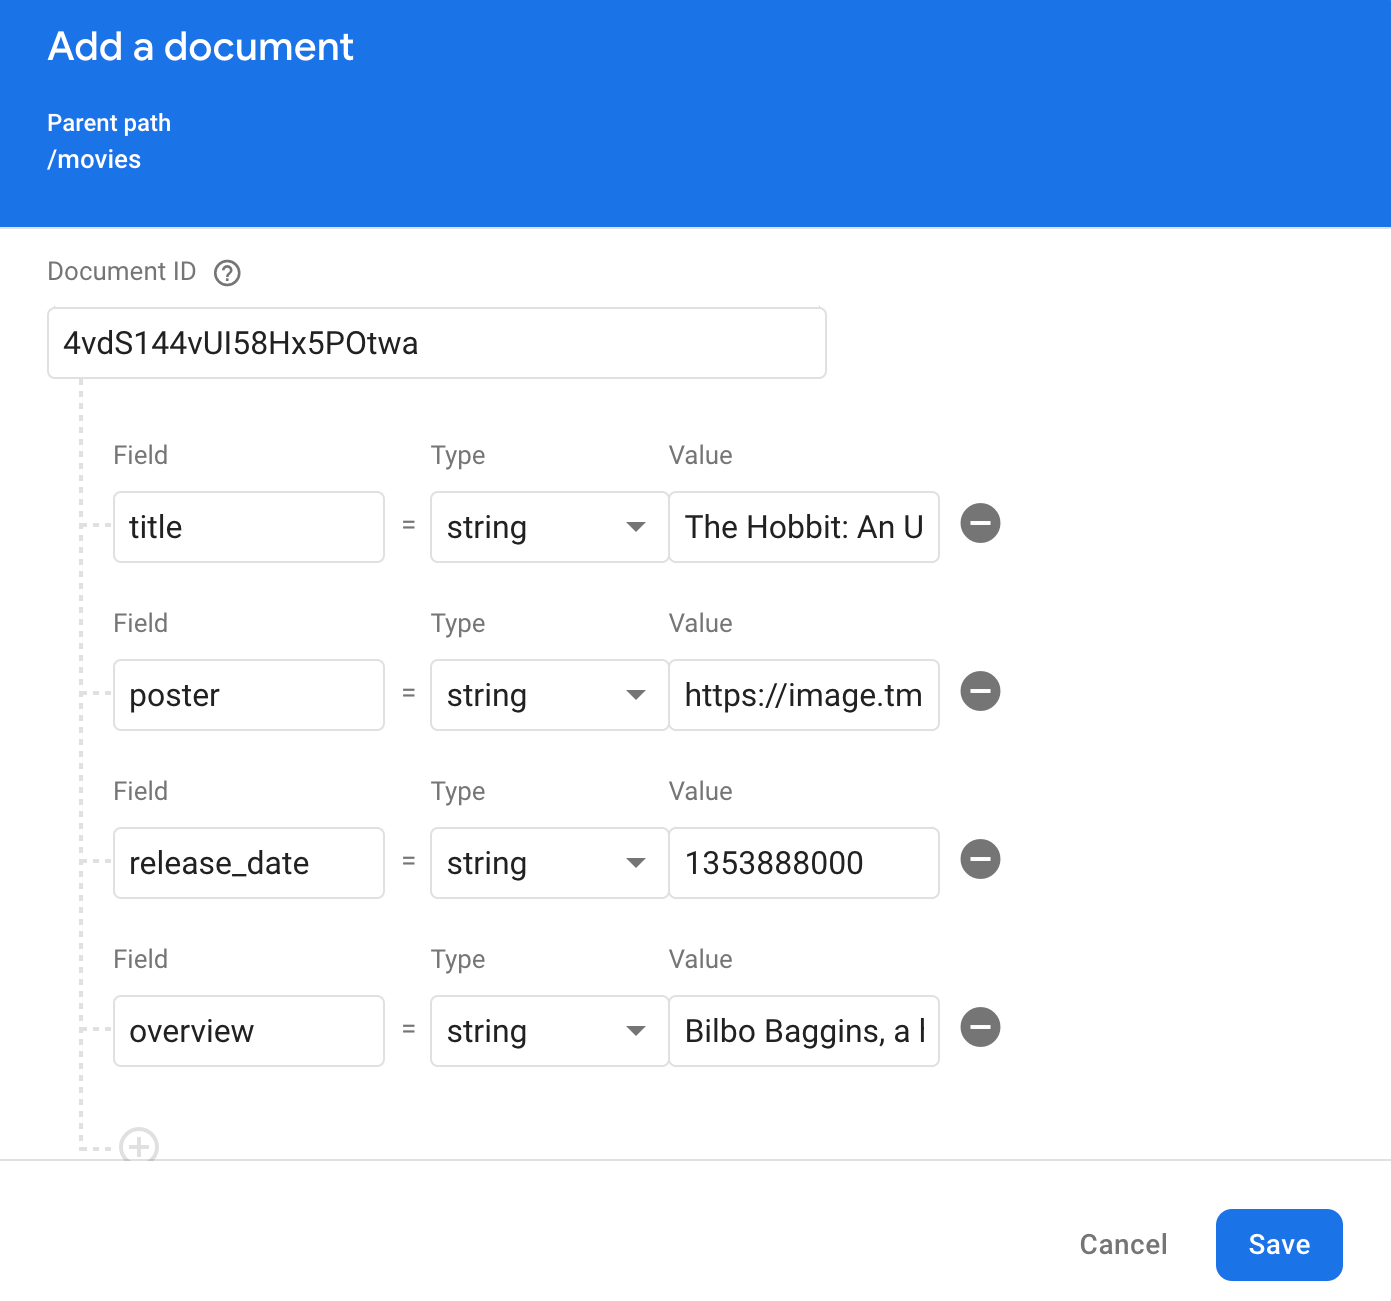
This is the data we are using in our example:
title
The Hobbit: An Unexpected Journey
poster
<https://image.tmdb.org/t/p/w500/yHA9Fc37VmpUA5UncTxxo3rTGVA.jpg>
overview
Bilbo Baggins, a hobbit enjoying his quiet life, is swept into an epic quest by Gandalf the Grey and thirteen dwarves who seek to reclaim their mountain home from Smaug, the dragon.
release_date
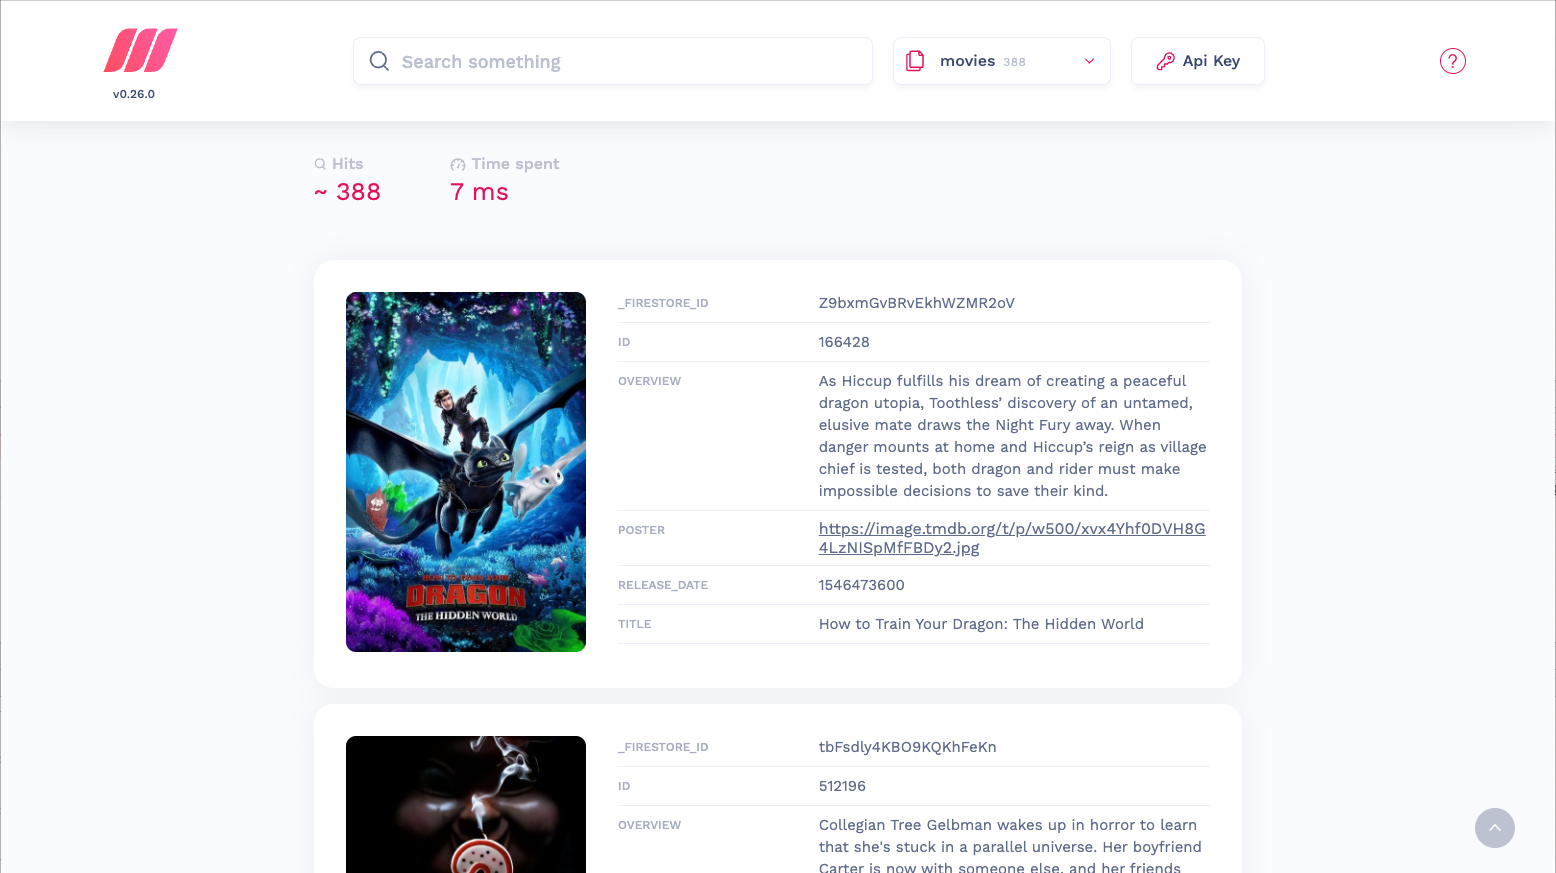
1353888000Once you added this movie, you should be able to see it when accessing your instance’s search preview:
Well done! You have successfully installed the Meilisearch Firestore extension!
From now on, whenever you add, update, and delete documents from your Firestore collection they will be mirrored in the same way in your Meilisearch instance.
firestore-meilisearch repository.Managing your extension
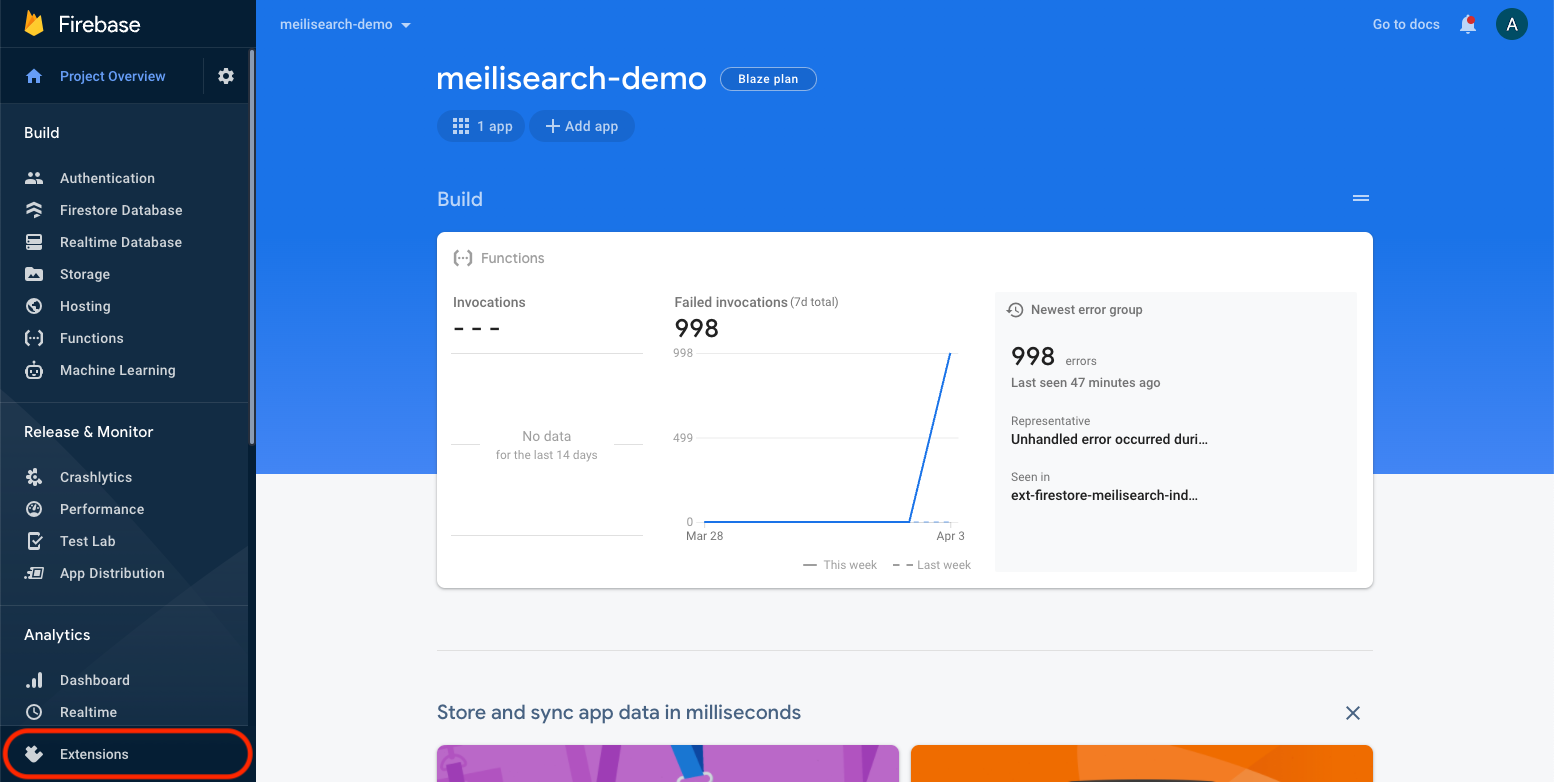
To access the overview panel of the extension, first click on the “Extensions” tab on Firebase’s sidebar menu, then find the Meilisearch extension and click on “Manage.”
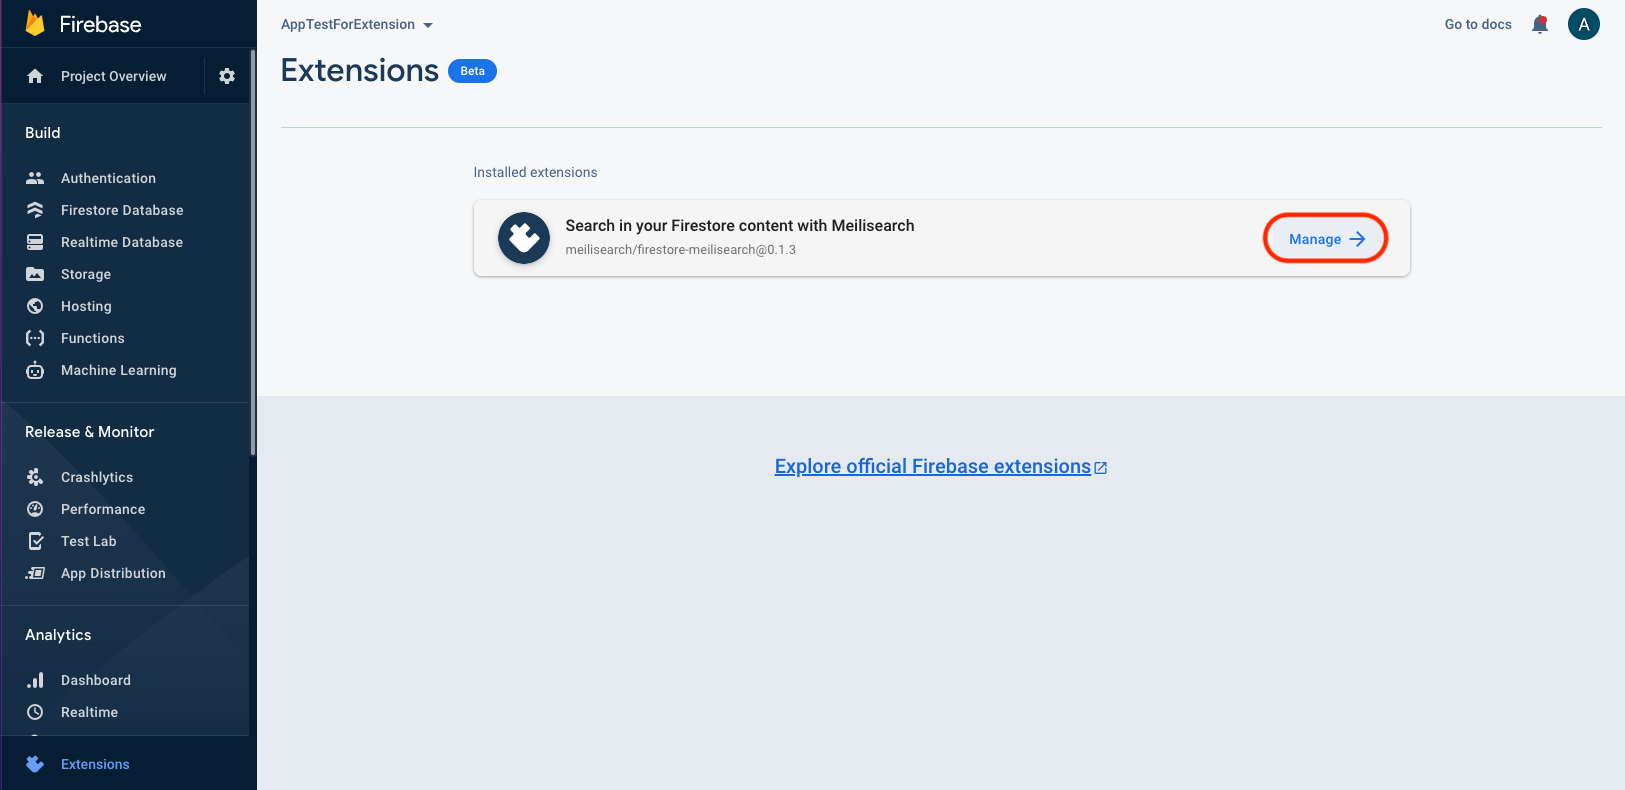
You will be directed to a page where you can access all the information about your extension, change its configuration, or even delete it.
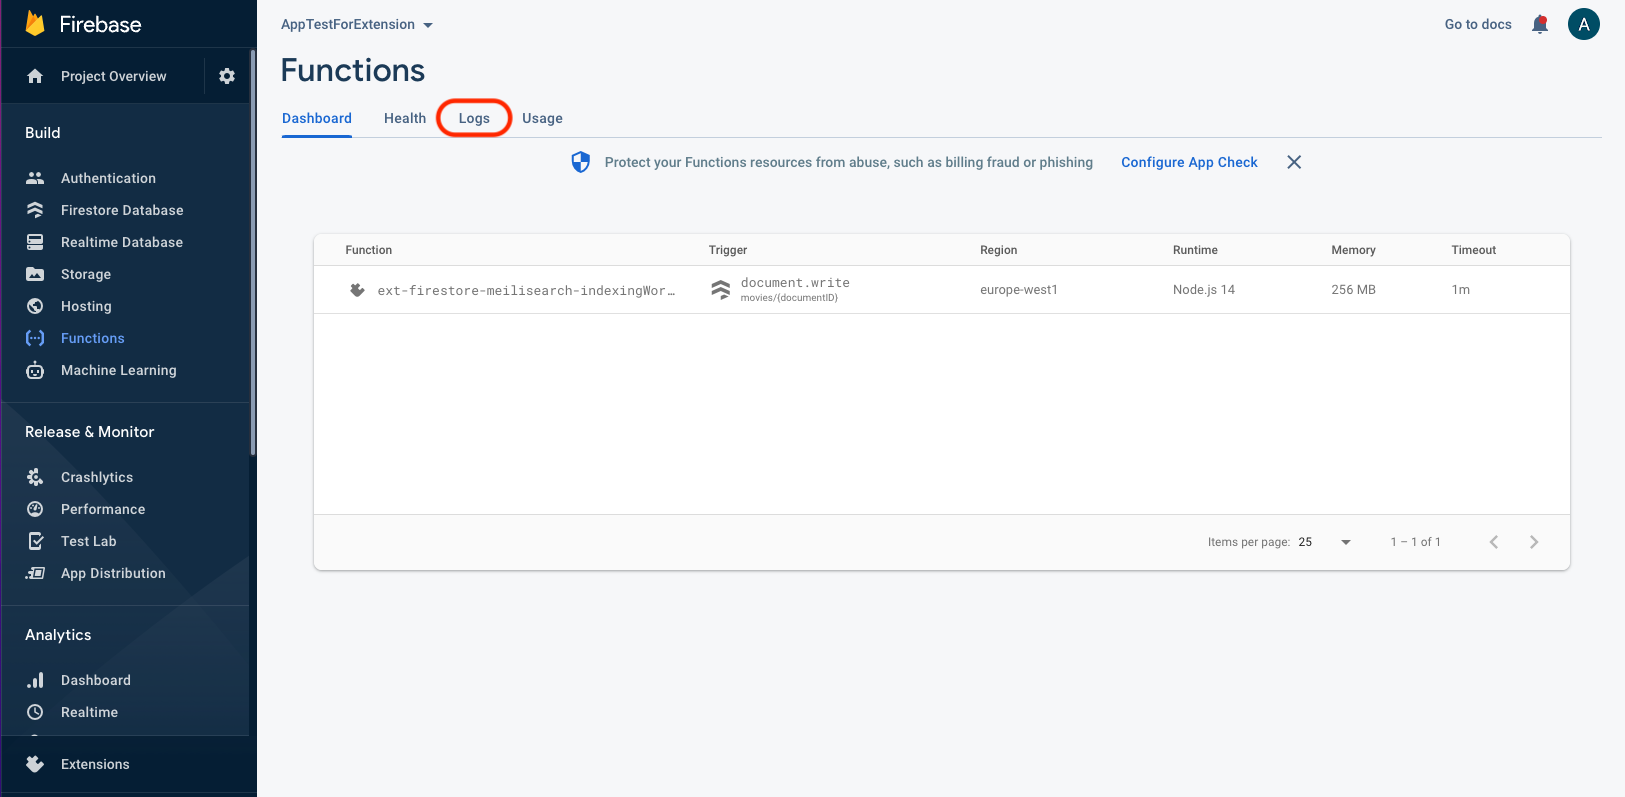
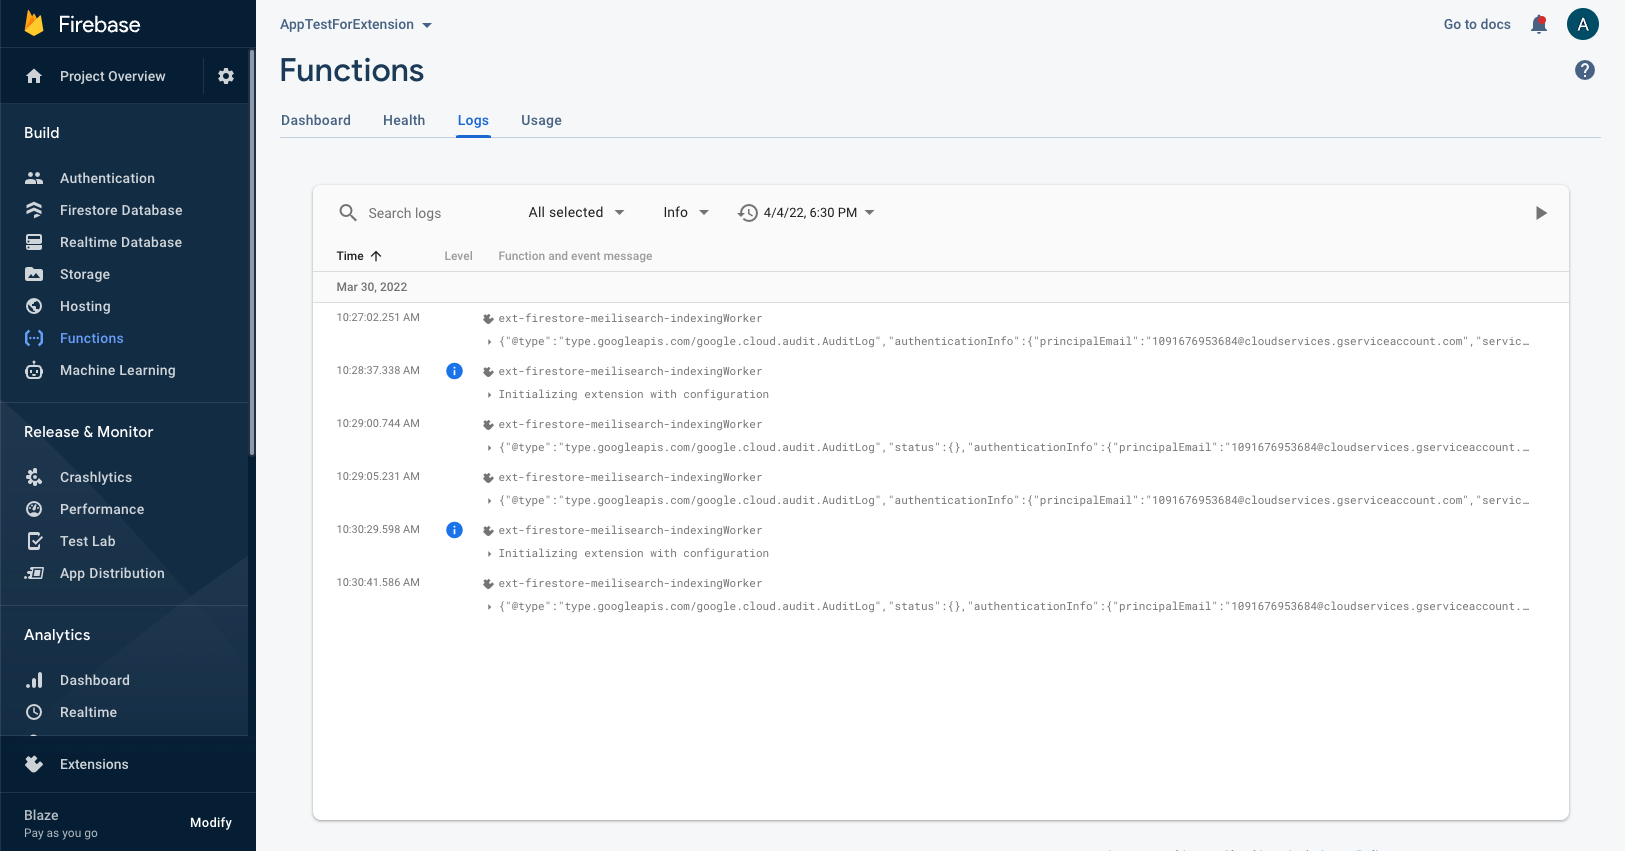
Accessing your logs allows you to monitor your cloud functions and obtain different levels of information. You may access an extension’s logs via the “Extensions” tab. Alternatively, you can also visit the “Functions” tab, then select “Logs,” as indicated in the image below.


Set up a search interface
We are done with installing and configuring the firestore-meilisearch extension, but it's no fun if we don't get to try the search in an actual front-end application. In this optional part, we will see how to create a search bar for your project using instant-meilisearch.
Populating your Firestore collection with data
The first thing we need to do is add more documents to our Firestore database. In our case, we are going to use this collection of movies. Consult Firebase documentation for more information on how to add and manage data.
Once you are finished adding content to your Firestore database, visit your instance’s search preview to check your documents have been successfully indexed by Meilisearch.
Search in your document
Now let's create a great search experience! There are many ways to do this, but we’ll keep it simple this time and use instant-meilisearch, our plugin for the instant-search JavaScript library. Read our article on instant-meilisearch to learn more.
Create anindex.htmlfile in your preferred development environment. This HTML page should contain a search bar and a box to contain the returned search results:
<!DOCTYPE html>
<html lang="en">
<head>
    <meta charset="UTF-8">
    <meta http-equiv="X-UA-Compatible" content="IE=edge">
    <meta name="viewport" content="width=device-width, initial-scale=1.0">
    <title>Meilisearch demo</title>
    <link rel="stylesheet" href="<https://cdn.jsdelivr.net/npm/instantsearch.css/themes/algolia-min.css>" />
</head>
<body>
    <div>
        <div id="searchbox"></div>
        <div id="hits"></div>
      </div>

      <script src="<https://cdn.jsdelivr.net/npm/@meilisearch/instant-meilisearch/dist/instant-meilisearch.umd.min.js>"></script>
      <script src="<https://cdn.jsdelivr.net/npm/instantsearch.js@4>"></script>
      <script>
          const searchClient = instantMeiliSearch(
              'your Meilisearch url',
              'your Meilisearch API key'
            )
            const search = instantsearch({
              indexName: 'movies',
              searchClient
            })

            search.addWidgets([
              instantsearch.widgets.searchBox({
                container: '#searchbox',
              }),
              instantsearch.widgets.hits({
                container: '#hits',
                templates: {
                  item: `
                    <div style="text-align:center;">
                      <div class="hit-name">
                        {{#helpers.highlight}}{ "attribute": "title" }{{/helpers.highlight}}
                      </div>
                      </br>
                      <div>
                        <img src="{{poster}}" width="200px" />
                      </div>
                    </div>
                  `,
                },
              }),
            ])

            search.start()
      </script>
</body>
</html>
Don’t forget to replace the example’s configuration with your own data. This might include the indexName, if you named your index something other than movies, your instance’s URL, and your API key.
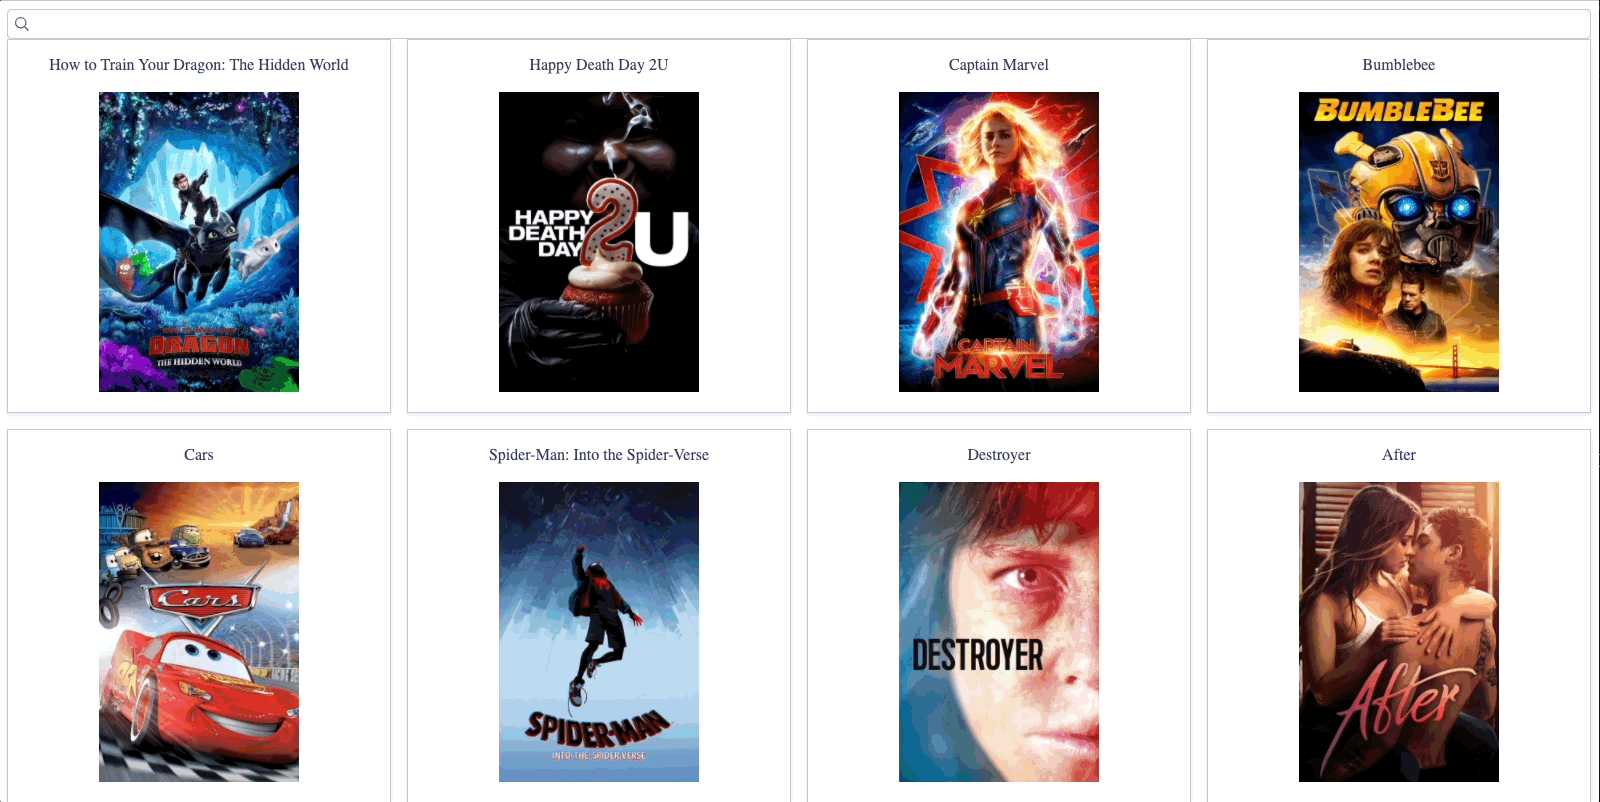
If everything went well, you should be able to access your index.html file and start searching right away:
Congrats! You have added full-text search capability to your Cloud Firestore. Your Firebase collection and your Meilisearch index will automatically stay in sync as long as the firestore-meilisearch extension is installed.
Thanks for following this little tutorial! Questions, comments, suggestions? Don't hesitate to get in touch with us on GitHub—trust us, we love your feedback.