
What is multitenancy?
In software development, multitenancy means that multiple users - also called tenants - share the same computing resources but have different access to system-wide data. In Meilisearch, you might have one index containing data belonging to many distinct tenants. In such cases, your tenants must only be able to search through their own documents.
You can achieve this using tenant tokens.
Tenant Token
Tenant tokens are small packages of encrypted data presenting proof a user can access a certain index. They contain security credentials and instructions on which documents within that index the user is allowed to see.
The primary use case for tenant tokens is to enforce restrictions based on user permissions.
A user can generate a tenant token using Meilisearch SDKs or custom code.
Tenant tokens do not require you to configure any specific instance options or index settings. They are also meant to be short-lived—Meilisearch does not store nor keep track of generated tokens.
When using an SDK to generate a tenant token, you need four parameters:
- Search rules: Search rules are a set of instructions defining search parameters that will be enforced in every query made with a specific tenant token.
- API key: A token has access to the same indexes as the API key used to generate it.
- API key uid: The uid of the API key used to generate the token allows checking that the API key used is valid.
- Expiration date(optional): The expiration date of the tenant token
You can read more about the tenant token payload in the documentation.
Requirements
Creating a tenant token
A tenant token can be created using the generateTenantToken function available in the Meilisearch Javascript SDK.
Here’s a simple example for creating a tenant token using the Meilisearch SDK
client = new Meilisearch({
	host: "<http://localhost:7700>",
	apiKey: "masterKey"
})
// We have created a Meilisearch instance in JavaScript and we will use this to create the tenant token.

const apiKey = 'rkDxFUHd02193e120218f72cc51a9db62729fdb4003e271f960d1631b54f3426fa8b2595';
const apiKeyUid = '85c3c2f9-bdd6-41f1-abd8-11fcf80e0f76'
const expiresAt = new Date("2025-01-01")
// Now we have declared the API Key, its uid, as well as the expiration date for the token.

searchRules = {
	"*": {
		"filter": "user_id = 1"
	}
}
// Here we have defined the search rules that will apply restrictions on the search results.

tenantToken = client.generateTenantToken(apiKeyUid, searchRules, {
	expiresAt: expiresAt,
	apiKey: apiKey,
})
// Now the generateTenantToken function will create a tenant token and Meilisearch can validate this token with the apiKey.
When Meilisearch gets a search query with a tenant token, it decodes it and applies the search rules to the search request.
Application Usage
Let's say we have a medical record system in a Meilisearch instance with the patient_medical_record index. This index contains a list of patients along with their details. We can use tenant tokens to restrict access to this data.
Sample dataset:
[
	{
	    "patient": "John",
	    "description": "John is in room number 2 and is suffering from Covid",
	    "roomNumber": 1,
	    "isDoctorAppointed": true
	},
	{
	    "patient": "Zia",
	    "description": "Zia is in room number 3 and is suffering from Dengue",
	    "roomNumber": 2,
	    "isDoctorAppointed": true
	},
	{
	    "patient": "Kevin",
	    "description": "Kevin is in room number 4 and is suffering from Typhoid",
	    "roomNumber": 3,
	    "isDoctorAppointed": false
	}
]
In the above dataset, we have three patients: John, Zia, and Kevin. The aim is to restrict Zia from accessing Kevin and John's data. To achieve this, we need to create a tenant token for her with a set of search rules.
For this case, the search rules can be specified as:
"searchRules": {
      "patient_medical_record": {
          "filter": "patient = Zia"
      }
  }
Zia's tenant token will be applied at the time of the search request, which returns:
[
	{
	    "patient": "Zia",
	    "description": "Zia is in room number 3 and is suffering from Dengue",
	    "roomNumber": 2,
	    "isDoctorAppointed": true
	}
]
This is a simple use case, but we can modify the rule to meet more complex requirements.
Integrating the multitenancy feature in your application
We will use the above example to create an application for displaying patients in a Meilisearch index. We will then use multitenancy to restrict access to this data.
-
Download the application
Clone the boilerplate code for the demo application from the Meilisearch tutorials repository on Github.
Use the following command:
git clone https://github.com/meilisearch/tutorialsThe boilerplate code exists in the
src/tenant-token-tutorialdirectory.cd src/tenant-token-tutorialThis code contains a frontend application built in
React.jsand a backend server inExpress.js/Node.js. -
Start Meilisearch
There are multiple ways to download and run a Meilisearch instance. The easiest way to run a Meilisearch instance is using Meilisearch Cloud, there's a free 14-day trial, no credit card required. Meilisearch is open-source, in this demo, we'll run it locally using Docker:
docker pull getmeili/meilisearch:v1.0


docker run -it --rm \
    -p 7700:7700 \
    -e MEILI_MASTER_KEY='masterKey'\
    -v $(pwd)/meili_data:/meili_data \
    getmeili/meilisearch:v1.0 \
    meilisearch --env="development"
Don't forget to define a master key as shown above when launching Meilisearch. It will create the API keys needed to generate the tenant tokens.
The Meilisearch instance will run on the IP address:
http://localhost:7700. -
Adding data to Meilisearch
There is a
data.jsonfile in theseedfolder of the base directory with a list of 10 patients suffering from multiple conditions with 100 entries, each with a room number and some patient details. We'll enter the information into Meilisearch.Change the terminal directory to the
seedfolder and add the given data to the Meilisearch instance, using the following command:npm install # This command will install node dependencies npm start # This command will add all the data from data.json to Meilisearch -
Start frontend server
Navigate to the
frontendfolder, and install all the application dependencies, and Meilisearch Javascript SDKnpm install # To install all the react application dependency npm install meilisearch # To install the Meilisearch SDKIt can take a while to install all the dependencies of the project.
Let's get the frontend React server up and running with the command:
npm startThe app will run on the IP address:
http://localhost:3000.
-
Adding the functionality to create tenant tokens
Navigate to the
backendfolder and install all dependencies using the following command:npm installIn the
backendfolder, open theindex.jsfile. It contains the APIs' route and logic.An endpoint is already defined for generating the Tenant token:
app.get("/create-tenant-token", async (req, res) => {
  const { value: patientName } = req.query;

  /* Add functionality to create Tenant token */
});
Now, we'll add the functionality below the comment in the function.
We need an API Key, search rules, and an expiration date to generate a tenant token.
The API Key can be obtained from the
getKeysmethod in the Javascript SDK. ThegetKeysmethod returns a list of API Keys from which we can select one to use in the tenant token generation process. To do so, add the following code to the API method stated above:const { results } = await client.getKeys(); const apiKey = results.filter((res) => res.name === "Default Search API Key")[0].key; const apiKeyUid = results.filter((res) => res.name === "Default Search API Key")[0].uid;We can also use the
createKeyfunction to generate a new API Key.You can read more on API keys in the Meilisearch documentation.
By specifying search rules, we can now generate a payload. Use the following code to define a payload:
const payload = {
  patient_medical_record: {
    filter: `patient = ${patientName}`,
  },
};
If we need the token to expire after a year, we can set an expiration date when creating the token, as shown below.
const expiresAt = new Date(
  new Date().setFullYear(new Date().getFullYear() + 1)
);
To generate the token, we can now use the
generateTenantTokenfunction from the Meilisearch Javascript SDK, and return the generated token usingres.json() function.const tenantToken = client.generateTenantToken(apiKeyUid, payload, { apiKey, expiresAt, }); return res.json({ token: tenantToken });This is how the endpoint should be implemented:
 app.get("/create-tenant-token", async (req, res) => {
  const { value: patientName } = req.query;

  /* Add functionality to create Tenant token */
  const { results } = await client.getKeys();
  const apiKey = results.filter((res) => res.name === "Default Search API Key")[0].key;
  const apiKeyUid = results.filter((res) => res.name === "Default Search API Key")[0].uid;


  const payload = {
    patient_medical_record: {
      filter: `patient = ${patientName}`,
    },
  };

  const expiresAt = new Date(
    new Date().setFullYear(new Date().getFullYear() + 1)
  );

  const tenantToken = client.generateTenantToken(apiKeyUid,payload, {
    apiKey,
    expiresAt,
  });

  return res.json({ token: tenantToken });
});
The frontend requested endpoint will look like this:
http://localhost:5001/create-tenant-token?value=JohnA payload containing the search rules is created using the value
Johnfrom the API.Let's use the
npm startcommand to start the express API server. The server will run athttp://localhost:5001. -
Connect your APIs with the Frontend code
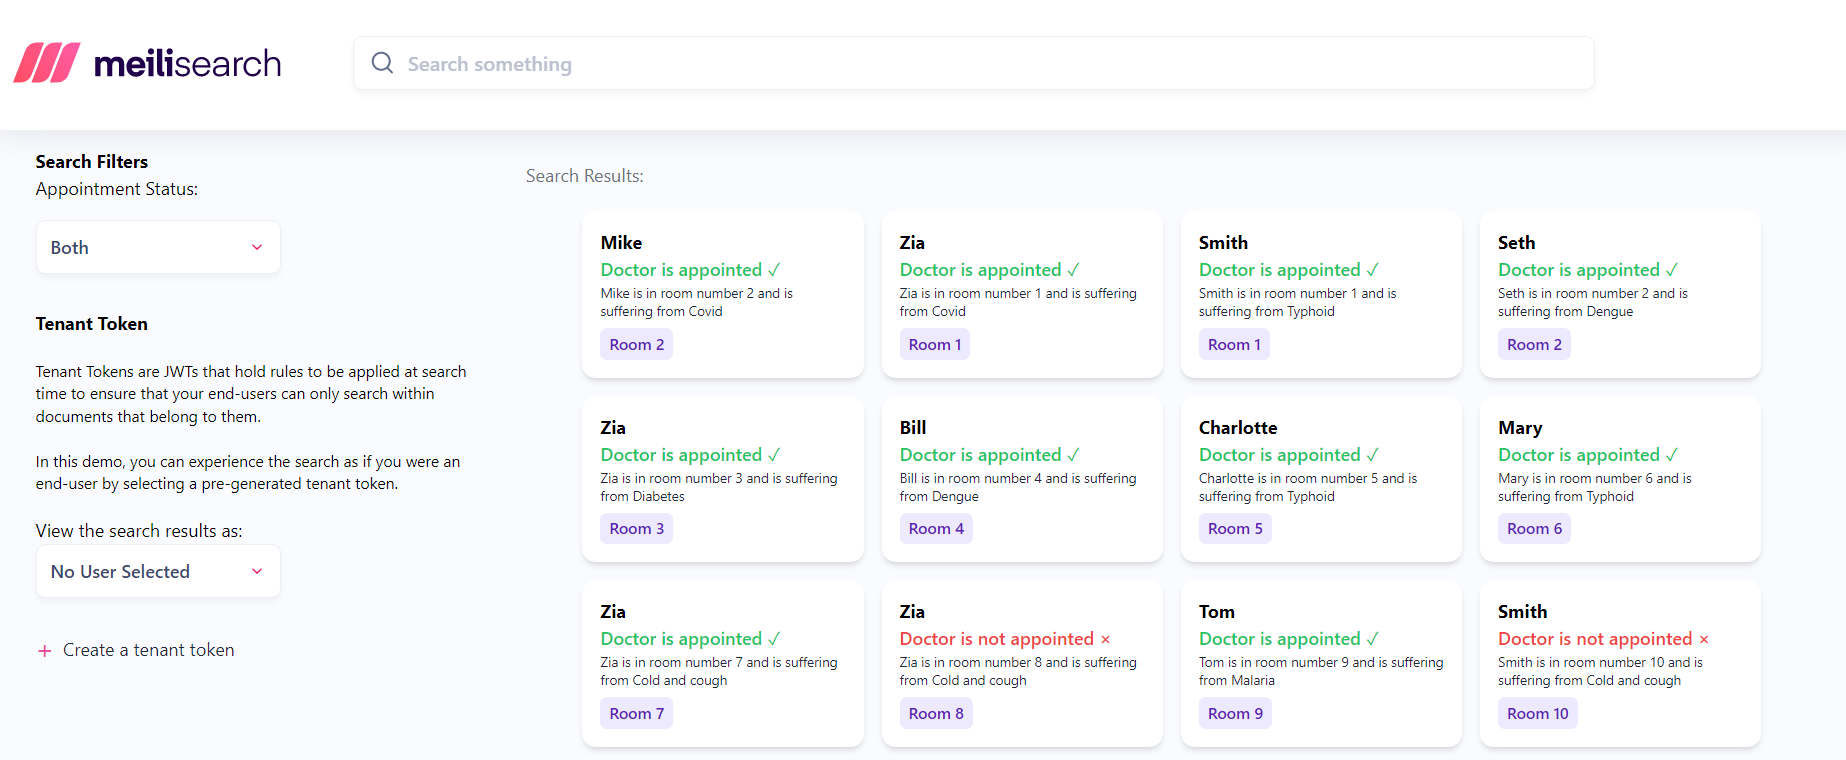
Enter the patient's name in the text box. On submitting the input form, an API call is sent to the backend, which should return a tenant token. We can pass this token to the Meilisearch instance when we need data on a certain patient.
The frontend code must now be configured to request a tenant token from the server. We'll use the axios library to get the token from the
/create-tenant-tokenAPI that we've developed, and we'll pass the patient name in the API's params.Open the file
index.jsin the/src/utilsfolder and look for thegetTenantTokenfunction. This function makes a request to the server and receives a tenant token back.Add the following code to the getTenantToken method:
export const getTenantToken = async (patientName) => { const response = await axios({ url: `${apiHost}/create-tenant-token`, method: 'GET', params: { value: patientName, }, }) return response.data.token } -
Test out the implemented functionality
Let's test the implementation; start by clicking the
Create a Tenant tokenbutton.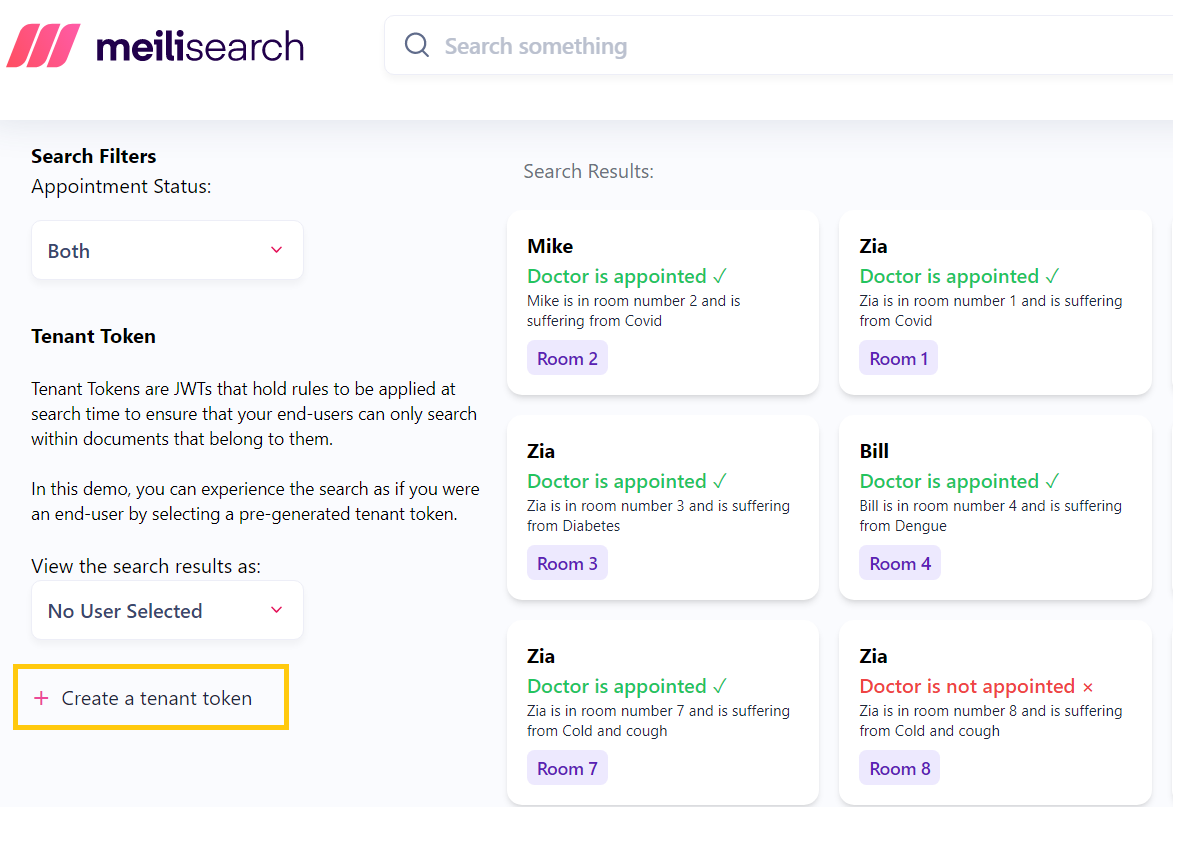
Type the name
Kevinin the given text box, and clickCreate a Tenant tokenbutton. This generates the tenant token.
Meilisearch will get data based on the tenant token provided by the patient, acting as an authenticator in the process.
Conclusion
We have restricted access to medical records based on the names of the patients. Using Meilisearch's multitenancy capabilities, we were able to execute all of this with ease. This is a pretty basic use case scenario that comes to mind. The functionality can be as complex as you want it to be. For example, we can implement multitenancy in an e-banking application where the central authority is the bank and the customers are tenants having access to distinct bank accounts.
If you have any questions, please join us on Discord. For more information on Meilisearch, check out our Github repository and our official documentation.